I hope you guys like the tips. I've been enjoying sharing my process with you! And thanks for the sweet comments!
Sunday, October 25, 2009
Still Misting!
Just a few more pages rockin' the mist action...
On this one I used the white cardstock I used to catch the extra mist from my cards in the previous post. It was so misty and funky that I couldn't bare to throw it away...so this page was born. I used a lot of the left overs like the chipboard from the packaging of the dream street cut outs and since I had run out of "t"s, i used the chipboard sheet the letters were on as a stencil and traced it on the page.

And on this last layout, remember the haunted house mini I did? I used the cover (before I decorated it) as a mask and sprayed the silver mist over it. This gave the cover a cool shimmer and make a rockin' background page for this layout.
Monday, October 19, 2009
Misting up a storm!
SO much fun this kit was!
You KNOW I had to rock that mist! For the cards above, I used the word bubble chipboard as a mask and sprayed the mist over it then removed it and placed the chipboard letters in it. Perfect everyday greating cards.
For the "Remember this" layout I used the chipboard packaging after I punched out the circles as a stencil to make the circles and just misted over it.
Well that's all I got for now. How are you using your kit?
Below is a spooky mini book I did by tracing a foam haunted house shape I found at the dollar store onto the patterned paper and cut it out.
I then cut out the same shape from a piece of clear thick overlay and attached them together with eyelets. Also, I cut out a piece of orange paper the same shape to show through the windows and a piece of chipboard as the back of the album. The inner pages are just cut square to reduce in all the fancy cutting. Then used my bind it all to bind it together at the bottom.
For the layout below I used the "friendship" chipboard word and trimmed it to just say "friends" then covered it in the red patterned paper and sanded the edges.
Well that's all I got for now. How are you using your kit?
Tuesday, October 6, 2009
Packed With Inspiration
Pink Paislee, Maya Road Chipboard & Maya Mists, OH MY!
The masters created some great inspiration for you with this packed kit...
Stephanie Powers
Cards made with scraps! That's a lot of scraps! This kit is amazing!
Stephanie Powers
The masters created some great inspiration for you with this packed kit...
Stephanie Powers
Cards made with scraps! That's a lot of scraps! This kit is amazing!Stephanie Powers
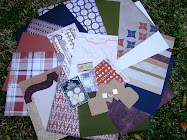
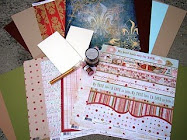
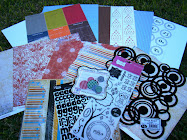
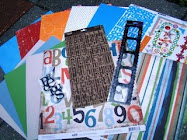
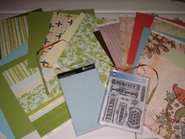
The kit contains: Pink Paislee Papers & Diecuts & Bazzill SolidsMaya MistMaya Chipboard Keychain WordsUrban Ink Chipboard LettersUrban Ink Chipboard EmbellishmentsBazzill Solids to match Urban Inks Papers at a cost of $24.99! That's a great deal ...there is over $34 worth of product in this kit!
Sunday, October 4, 2009
Autumn Comfort
You know me...
Tuesday, September 29, 2009
Now that your new kits are in...
I thought I would pop in with a few more pages from last month...just in case you are still just admiring it! LOL

I still have TONS of this kit left! Now if I have time to create more with it is a whole different topic! But I'm sure gonna try!
Thursday, September 17, 2009
So how did I use it?
Sunday, September 6, 2009
The Masters Look through the "Kaleidoscope"
Wednesday, September 2, 2009
Look through the KALEIDOSCOPE!
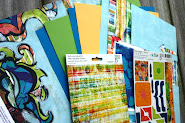
"Kaleidoscope" is the new Masters Kit!
And what a Kaleidoscope of color and inspiration it is!
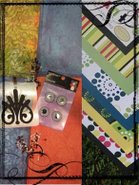
Do you see that Fleur de Lis stamp by Teresa Collins?! What about those fabulous brads from KaiserCraft!
If this kit doesn't get your creative juices going, I don't know what will! I'm itching to work with mine!
Up next, how the Masters used this beautiful kit.
A few more to add...
I know, I know...y'all thought I was done. But this kit just kept going and going!
For the page above, I used the bottom strips of all the papers and sewed them on the page to form a unique element. I also left the edges long at the top to add interest as they stick up above the page.
Friday, August 14, 2009
The flip side...
Yes I finally finished working with the other half of the kit! And here are my creations...

As you can see, I have a serious problem with my sewing machine and misting addiction. I.just.can.not.stop!
So get creative...get messy...just scrap!
Saturday, August 8, 2009
The Circus has come to MY town
And I made some pretty cool layouts with it...
Still using that Maya mist on most of my pages. For the "Lil Cowboy page I layed one of the sheer journaling cards down (one with the scalloped edge) and misted over it to create a little window area for another picture.
For the "Paved"layout I put the thickers down and misted over them and then removed them to create the title.
Still using that Maya mist on most of my pages. For the "Lil Cowboy page I layed one of the sheer journaling cards down (one with the scalloped edge) and misted over it to create a little window area for another picture.
For the "Paved"layout I put the thickers down and misted over them and then removed them to create the title.The "Paradise" layout below goes with the "Paved" layout....
I need to add my journaling but it's going to be sort of personal since this layout is about the demoliation of my great grandmother's old house. Hince the title "Paved Paradise". I need some time to think about the words I want to capture on these pages.
Then I did a fun layout when I did the "slide" page.
I need to add my journaling but it's going to be sort of personal since this layout is about the demoliation of my great grandmother's old house. Hince the title "Paved Paradise". I need some time to think about the words I want to capture on these pages.Then I did a fun layout when I did the "slide" page.
Subscribe to:
Posts (Atom)