
Thursday, March 31, 2011
Friday, February 25, 2011
Memory Mania Expo & Demo day - 1 more day

Your February Masters Kits are ready for pickup!!
Echo Park be Mine & My Minds Eye Fine & Dandy & other scrappin' goodies. We have 2 kits available-it you've been waiting to join Masters Kit Club-this is your chance!!
Saturday, February 26th 10am-noon
ONE more day until Memory Mania Expo & Demo Day. Join us for a really FUN SCRAPPIN' DAY!!!!
- Free gift with every purchase
- Stephanie will have the new Fiskars Border Punches for you to create a make/take!!
- Noelle will be HELPNIG YOU create pinwheels!!
- TWINE took CHA by storm!!! Every company is coming out with twine-as of now only one company was shipping so stop in & snatch up some twine. Christy will giving a peek at some cool things YOU can do with twine in her make/take. P.S. AND she will be featuring LOTS MORE of twine tricks in her Latest & Greatest Class (along with some other "hot off the press Tim Holtz products".
- LOTS of cool new papers (we have all lines that are available so far, stay tuned for March Expo - Part II we'll have even more)
- Enter drawing for $100 Shopping Spree
$5 Friday: Cropper Hopper Stamp Shelf
Thanks for reading & Happy Scrappin
Tuesday, September 28, 2010
Expressing my inner Happy Trails...
It has taken me a while to really give this kit the time it deserved but I sure did have fun when I finally sat down to create with it! This month I was focused on projects...


 It turned out pretty cute too. I stitched on it as well but I used white thread on this one and I bound it at the top with a length of the ball trim. Since I needed it to be flat, I trimmed off the balls and used it more as a ribbon. Thankfully my kit had plenty of this trim so I can use it in all its glory on other projects! Speaking of other projects, I hope to create a few more so check back!!
I made a great simple little set of inspirational greeting cards.
...complete with a little band to hold them all together. You know the holidays are coming around and I have to have some premade card sets for gifts laying around. Such a time saver!
Next I decided I'd make a little notebook.
Wednesday, September 8, 2010
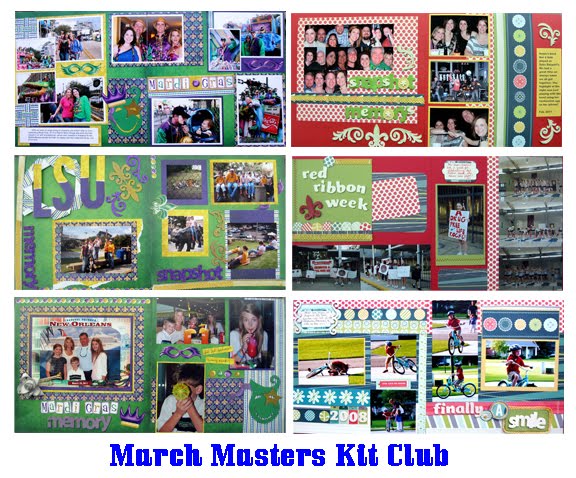
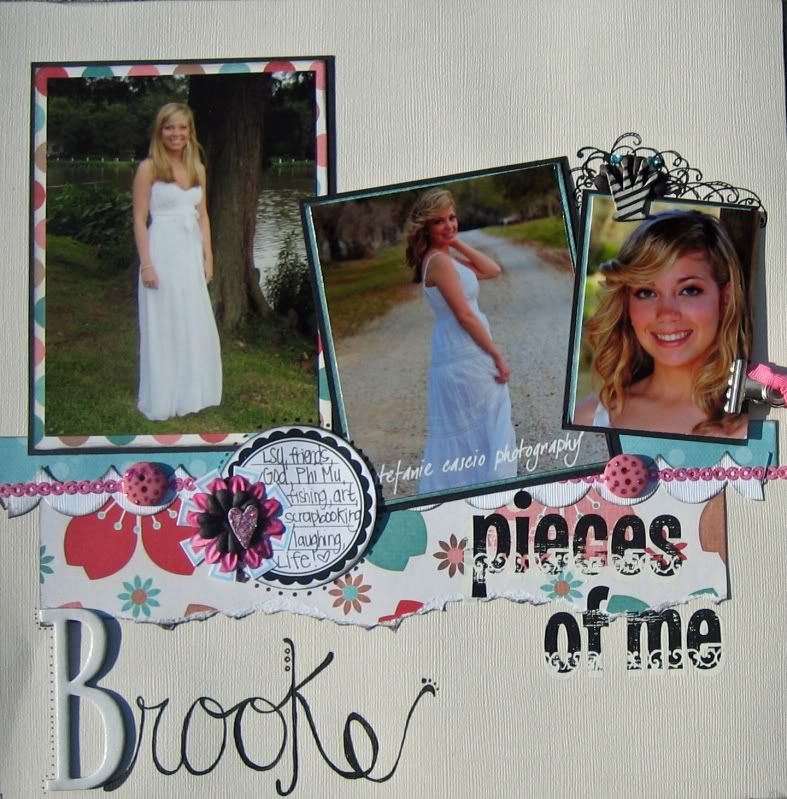
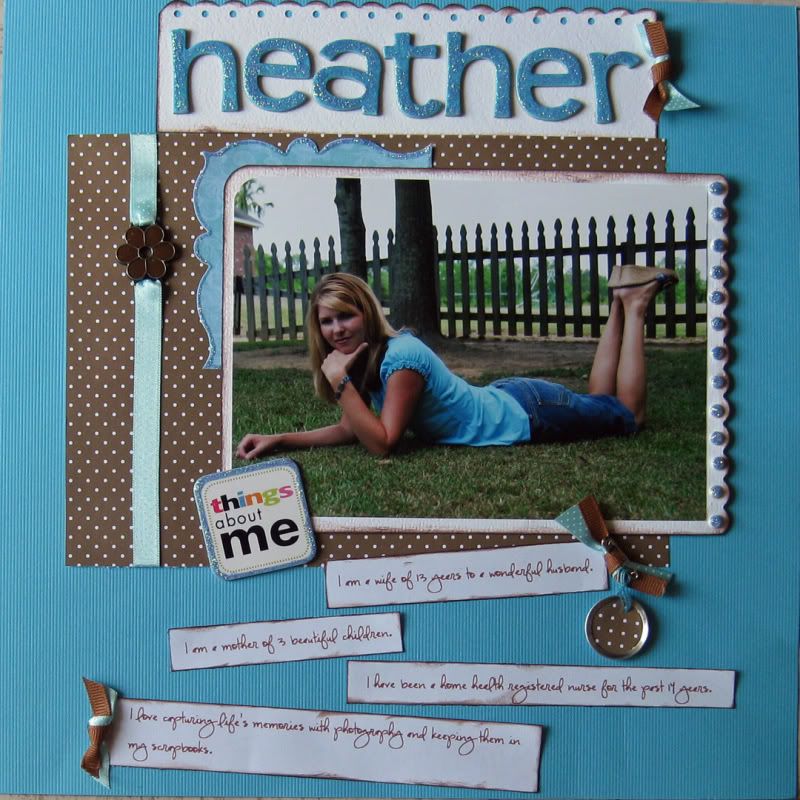
The Masters Enjoy Happy Trails!!
Seriously love this kit! Check out the amazing inspiration provided by the Masters this month!


Heather


Jody


Noelle
Stephanie


Have you picked up your kit yet? TONS to play with!!
If you would like to sign up for the Masters Kits, contact Tammy and she will get you started on this amazing time and money saving kit!
Friday, September 3, 2010
Happy Trails to You...
Till you meet your kit!

This kit is filled with great travel papers and embelishments!! That Basic Grey doilies paper is to die for!!


And check out these die cuts! So cute. So, so cute. And ball fringe...you may not know this but I adore ball fringe!!
Now I have to dig up some travel pics to get my scrap on!! Stay tuned for the pages the masters did.
Wednesday, August 25, 2010
Greetings & Salutations...

So if you are like me you are always looking for some handmade cards at the last minute but never have the time to make them when you need them. So why not make them before you need them? Grab all those yummy bits and pieces from this kit and get creative. I choose to do repeated circles and stars and mix in a lot of machine stitching. The look is clean, modern and trendy. So go ahead...and think ahead! You will be grabbing these cards on your dash to a birthday party before you know it!
Tuesday, August 17, 2010
So I've been scrappin'...
Yep, scrappin'!

Now you know I'm more of a project girl. But I've been participating in some challenges lately that have me going outside my comfort zone a bit. These two pages are a product of that. The page above was made with no pictures so it forced me to journal, which I don't do very well.

For this page, I scrapped about my biggest influence...my sweet husband.
So I challange you...step outside your comfort zone and scrap something you wouldn't normally scrap or use a different format than you are used to. Do it. It's fun!
Now don't despair...I'll be back with some projects soon!!
Monday, August 9, 2010
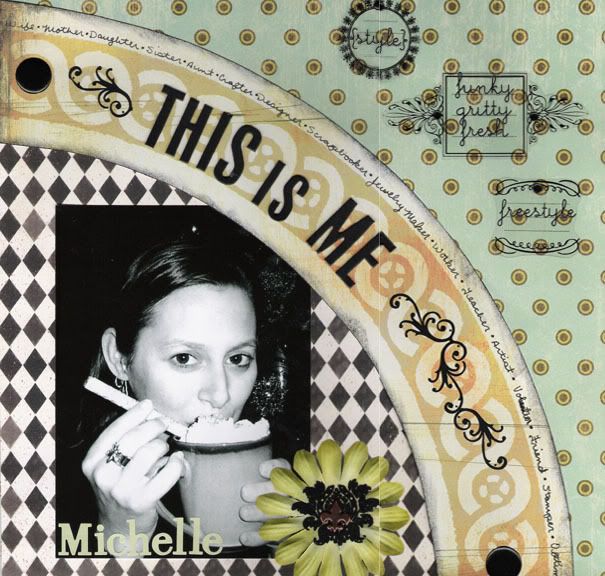
Masters shoot for the stars!
Check out the fun summer layouts our Masters did with the Lucky Star kit!!
Heather

Jody

Jody

Noelle

Stephanie

Sunday, August 8, 2010
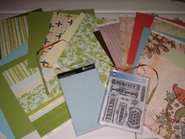
You must be my LUCKY STAR
I cetainly felt lucky when I opened up this month's Masters Kit.

Monday, July 19, 2010
Revisting the Fair...
More County Fair scrappies to share...
 I made this sweet little banner from the supplies in the kit and some pages in a vintage children's story book. These pictures were just too cute to not do something wonderful with!
 Next I scrapped a couple of pages too!
 Try mixing your patters and do some paper pieceing! It was so fun!

I even scrapped a page with pictures of the rocket we made earlier this month with the kit!
 Such a fun kit this month!
 I made this sweet little banner from the supplies in the kit and some pages in a vintage children's story book. These pictures were just too cute to not do something wonderful with!
 Next I scrapped a couple of pages too!
 Try mixing your patters and do some paper pieceing! It was so fun!
I even scrapped a page with pictures of the rocket we made earlier this month with the kit!
 Such a fun kit this month!
 Thursday, July 15, 2010
The Colors of the County Fair
A couple months ago I had an idea to make a color folder for Z's colors...
 And then when the County Fair kit came along, I knew it would be perfect for this project!
So I got to work on it!
 Just fold your 12 X 12 paper in the folder shape (based on the hight of your colors). Then free hand cut the scalloped edge along the top flap.
 And then when the County Fair kit came along, I knew it would be perfect for this project!
So I got to work on it!
 Just fold your 12 X 12 paper in the folder shape (based on the hight of your colors). Then free hand cut the scalloped edge along the top flap.
 Place a couple of the colors down in the folder slot and mark where you want your stitching to be, giving yourself a lot of room to play with. Stitch the slots for the colors. Then trim the striped paper to fit over the bottom half of the stiched area (the area that whos when the folder is closed.
 Then just decorate the outside cover flap with the word "colors" or your child's name and that's it. Just a fun, quick project your kids will love!
 Then just decorate the outside cover flap with the word "colors" or your child's name and that's it. Just a fun, quick project your kids will love!
Friday, July 9, 2010
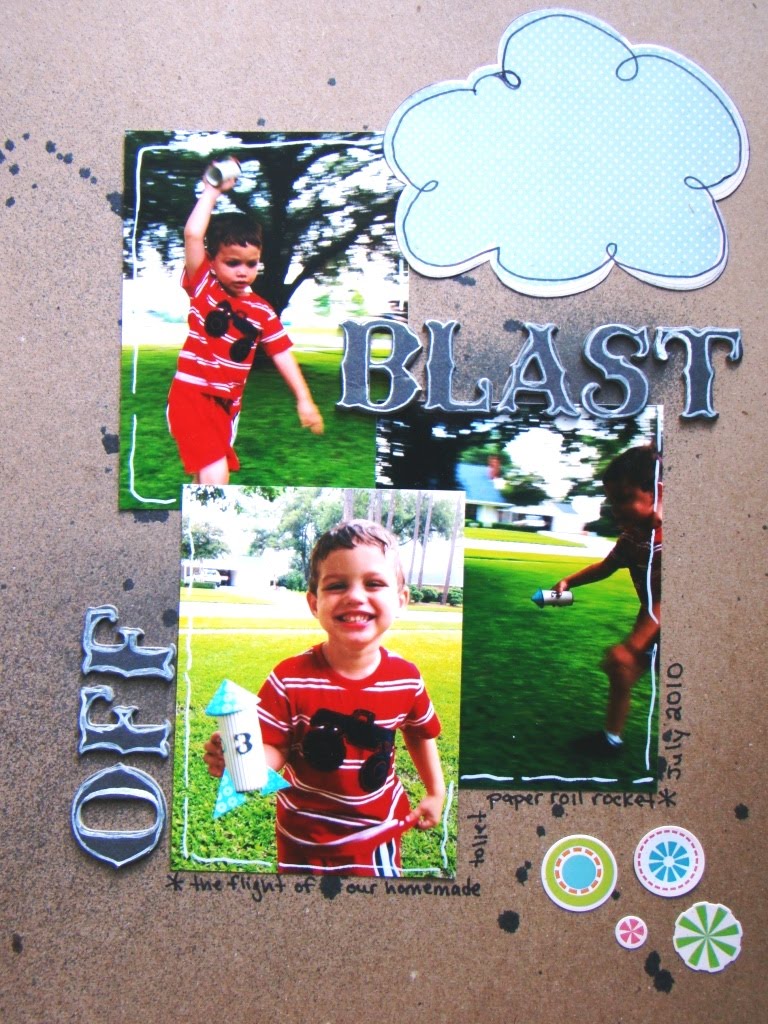
Having a BLAST with the County Fair...
Just a quick little project to use some of those scraps from your County Fair kit....
a ROCKET SHIP!!
 This was a quick little project I did with my little guy to pass the time this summer afternoon.
We gathered some simple supplies...
 Toilet paper roll
 First we wrapped the rectangle paper around the roll and secured with tape.
 Then I applied the patterened paper triangles to the chipboard triangles and cut slits in them. Next you just slip the roll in the slits to form the stand.
 Cut a slit up the side of the circle to the center.
 Then fold the circle into itself to make a cone and secure with tape.
 Then secure the top on with glue dots or tape.
a ROCKET SHIP!!
 This was a quick little project I did with my little guy to pass the time this summer afternoon.
We gathered some simple supplies...
 Toilet paper roll
Large rectangle of patterned paper
Large circle of patterned paper
Three patterened paper triangles (two going one way and one going the opposite)
Three matching triangles cut out of chipboard
Misc. embelishments
Scissors
Tape
I had all the items pre cut and had the double sided tape applied and ready to go. Three year olds don't have much patience for these things;)
 First we wrapped the rectangle paper around the roll and secured with tape.
 Then I applied the patterened paper triangles to the chipboard triangles and cut slits in them. Next you just slip the roll in the slits to form the stand.
 Cut a slit up the side of the circle to the center.
 Then fold the circle into itself to make a cone and secure with tape.
 Then secure the top on with glue dots or tape.
And presto! Time for a blast off!!


He had a blast!!


He had a blast!!

This smiling face was the only thanks I needed!
So who can you make a rocket ship with?
Wednesday, July 7, 2010
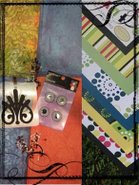
Master attend the County Fair...
and check out these "prizes" they walked away with!
Jody

 Heather


 Stephanie

Jody

 Heather
Noelle
 Stephanie
Friday, July 2, 2010
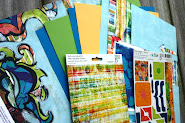
The County Fair is HERE!!
And you don't wanna miss it!
 Loaded with Lush papers, brads, ribbons and chipboard letters from My Minds Eye, Maya Road Chipboard and a delightful line of papers and cardstock stickers by Echo Park Paper Co.
 Oh JOY!! This kit is loaded and AMAZING! So glad I got this just in time for the long holiday weekend! Now off to play!
Subscribe to:
Posts (Atom)


